- Posted by: sofpavl
- Published: 15-12-2016
- Category: Application updates
Geo-fencing!
Our team is constantly working on further upgrading the system capabilities; we are excited to present our addition on the web application, Geo-fencing feature!
Using Geo-fencing, the Monitoring Center can be informed of whether a Checkpoint is scanned by the Guard within its
pre-defined area or not!
You can manage Geo-fencing for some checkpoint by following the steps below:
Login to the Web Application
Navigate to Company Check Points
Select the target checkpoint from the list of available checkpoints, and press the "Edit" link
Insert the "Latitude" and "Longitude" values (in order to define where the checkpoint will be physically placed)
Insert the "Geofence Radius" value (in order to define the acceptable circle area for the Guard location when
scanning the target checkpoint)
Note1: Radius is measured in meters.
Note2: Various factors should be considered when setting the radius: the Guards device location accuracy,
the checkpoints' physical location (surroundings, buildings, terrain..) etc - so you may have to tune this value
accordingly!
Check the "Geofence Enabled" checkbox
Finally, press on "Save" button

Geo-fencing on the target checkpoint has been set-up! Now, every time a Guard scans it, you can check whether the
Guard was within or out of the defined area! This can be seen on the Events Browser:
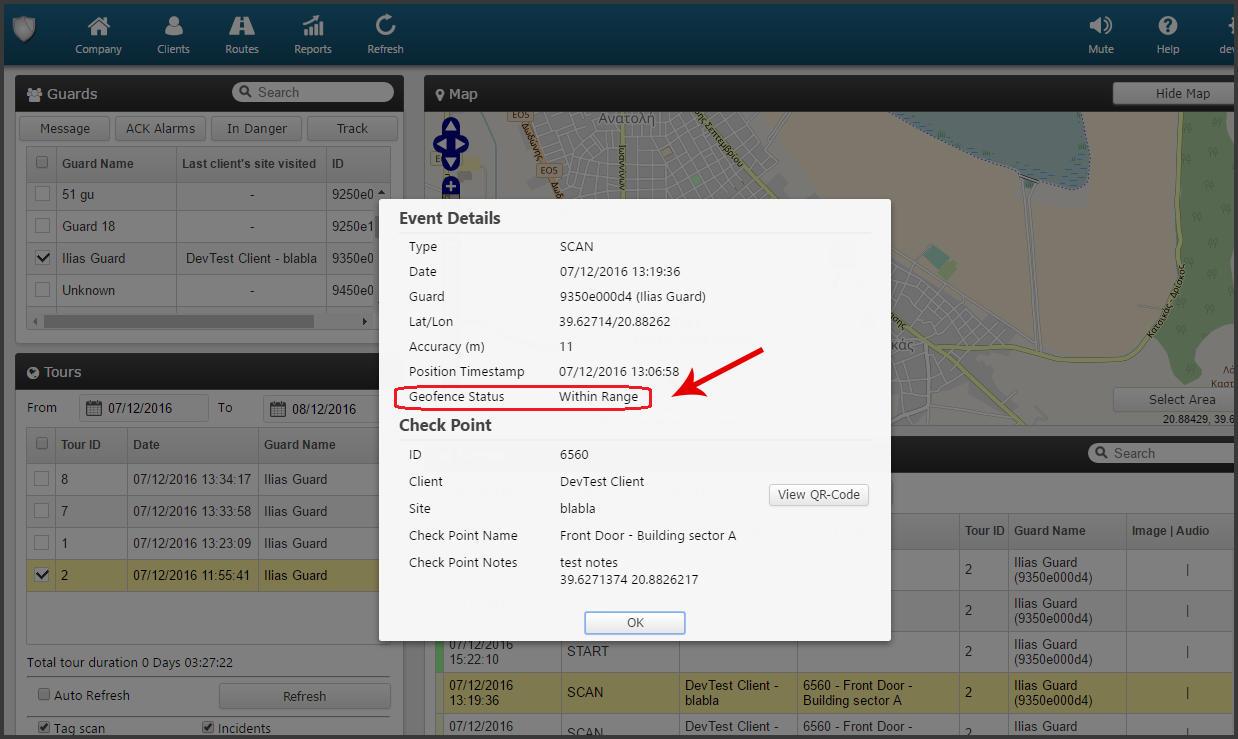
Select the target checkpoint Scan Event from the Events panel
Press on "View Details" button, to open a pop-up screen with details about the target Event
Field "Geofence Status" will display one of the following values:
- Within Range (if the Guard location was within the set radius of the checkpoint scanned)
- Out of Range (if the Guard location was out of the radius of the checkpoint scanned)
- Disabled (if Geo-fencing for the checkpoint scanned is disabled)
We hope that you will enjoy Geo-fencing!
And stay tuned for many more updates that will follow!
For more details on QR-Patrol, feel free to contact our sales team.