- Posted by: sofpavl
- Published: 05-08-2016
- Category: QR-Patrol tutorials
How to insert and assign beacon checkpoints
On a previous How-To guide lesson, we showed you how to assign NFC tags and QR-Code checkpoints to your assets. Under this lesson, you can learn how to insert and assign our latest checkpoint type, beacons!
Add beacons
Click on the "Company" button on the left of your navigation bar, and choose "Check Points".
At the top navigation bar of "Check Points" screen, click on the "Add" button and then select the “Beacon” option.
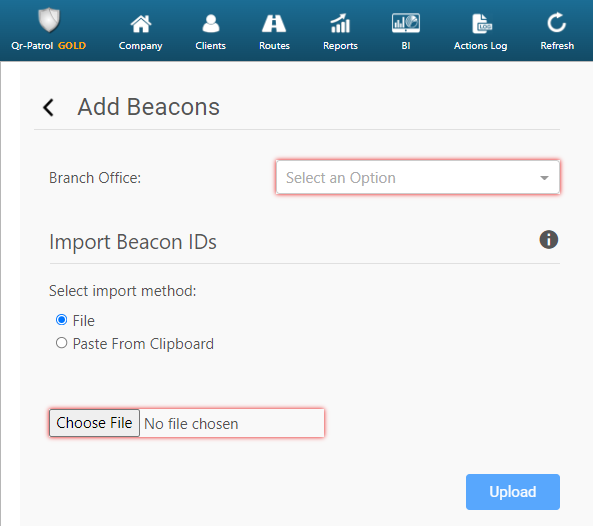
You have 2 options for uploading beacon ID(s):
- Choose the "File" radio button, to upload them via a txt file.
- Click on the "+" icon displayed, and upload a .txt file containing the beacon ID(s) (note that the various beacons IDs must be comma separated).
- Click on the "Upload" button to complete your import!
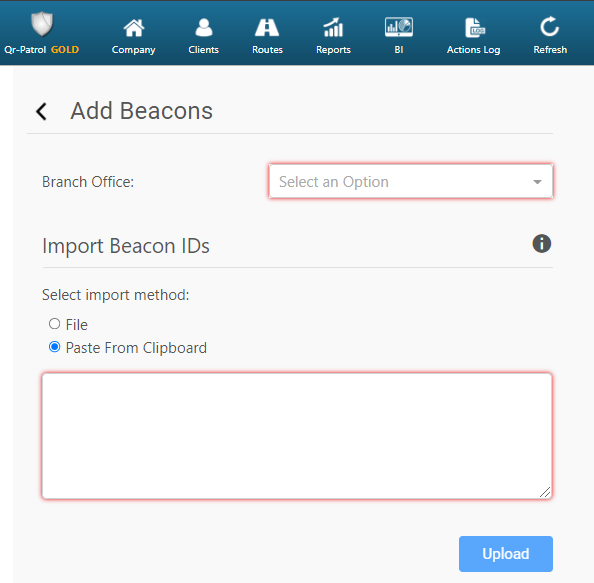
Or
- Choose the "Clipboard" radio button, to upload them via a text-box area.
- On the text-box area displayed, enter the beacon ID(s) (note that the various beacons IDs must be comma separated).
- Click on the "Upload" button to complete your import!
Technical Info
Make sure that your beacon ID(s) have correct format:
- For an iBeacon, you should use the UUID, Major and Minor values with an underscore between them (i.e. UUID_Major_Minor). For example, a valid iBeacon ID could be: e2c56db5-dffb-48d2-b060-d0f5a71096e0_6_6.
- For an Eddystone beacon, you should use the NamespaceID and InstanceID values with an underscore between them (i.e. NamespaceID_InstanceID). For example, a valid Eddystone ID could be: d3ex1918sde157cl1102_1cl1567drs27.
To retrieve/program these values you can use the Application provided by your Beacon supplier. Please note that the combination of those values (UUID_Major_Minor in case of iBeacons and NamespaceID_InstanceID in case of Eddystone beacons) has to be unique.
Assign beacons from web application
You can assign beacon checkpoints from your web application in two ways:
Click on the "Company" button on the left of your navigation bar and choose "Check Points".
Select one of the (beacon) check points from your list and click on "Edit".
Choose the Client and the Site to which you want the check point to be assigned from the two drop-down lists on the pop-up window (Assign row). Save the changes by pressing the "Confirm" button.
Or
Press the "Clients" button so the list of your clients will appear and then click on the client you wish to assign the QR label to, and choose "Edit".
A window will pop-up, at the bottom of which there will be a list with your client sites. Press "Add" to add sites for this client and for each site; you can assign checkpoints by pressing "Manage Points".
After choosing "Manage Points", a window will pop-up. At the bottom of this window, there is a list with all your checkpoints (including your beacon checkpoints). To add one or more of them to the specific site, check the one(s) you want and press the plus sign. Finally, to complete the assignment, press the "Confirm" button.
Assign beacons from mobile application (for Eddystone beacons)
If you are using Eddystone beacon checkpoints, you also have the option to assign them from your mobile application as follows:
Firstly, make sure that on your mobile application under Settings, the "Eddystone" Beacon Type is selected.
On your mobile application, click on ‘Checkpoint Assignment’.
Click on ‘Scan Beacon Tag’ and then press ‘Scan Beacons’. A list of all the Beacons in range (sorted by proximity) will appear on the top of your screen.
Note that the Beacons that already belong to your Company (have been added to your Checkpoints list) are displaying in green colour.
Click on ‘Stop Scanning Beacons’ and select (at least) one Beacon.
Insert a Description and/or a Site Code (optionally).
Click on ‘Assign’.
The Beacon will be added to your Checkpoint list and you will be then able to view it on your web-application by going to Company -> CheckPoints.
Download QR-Patrol mobile application
QR-Patrol mobile application is available in Appstore and Android market. You can simply download it from your smartphone, by clicking on one of the following buttons:


For more information you can read our Web Application and Mobile Application User Guides!