- Posted by: atagkas
- Published: 04-09-2015
- Category: QR-Patrol tutorials
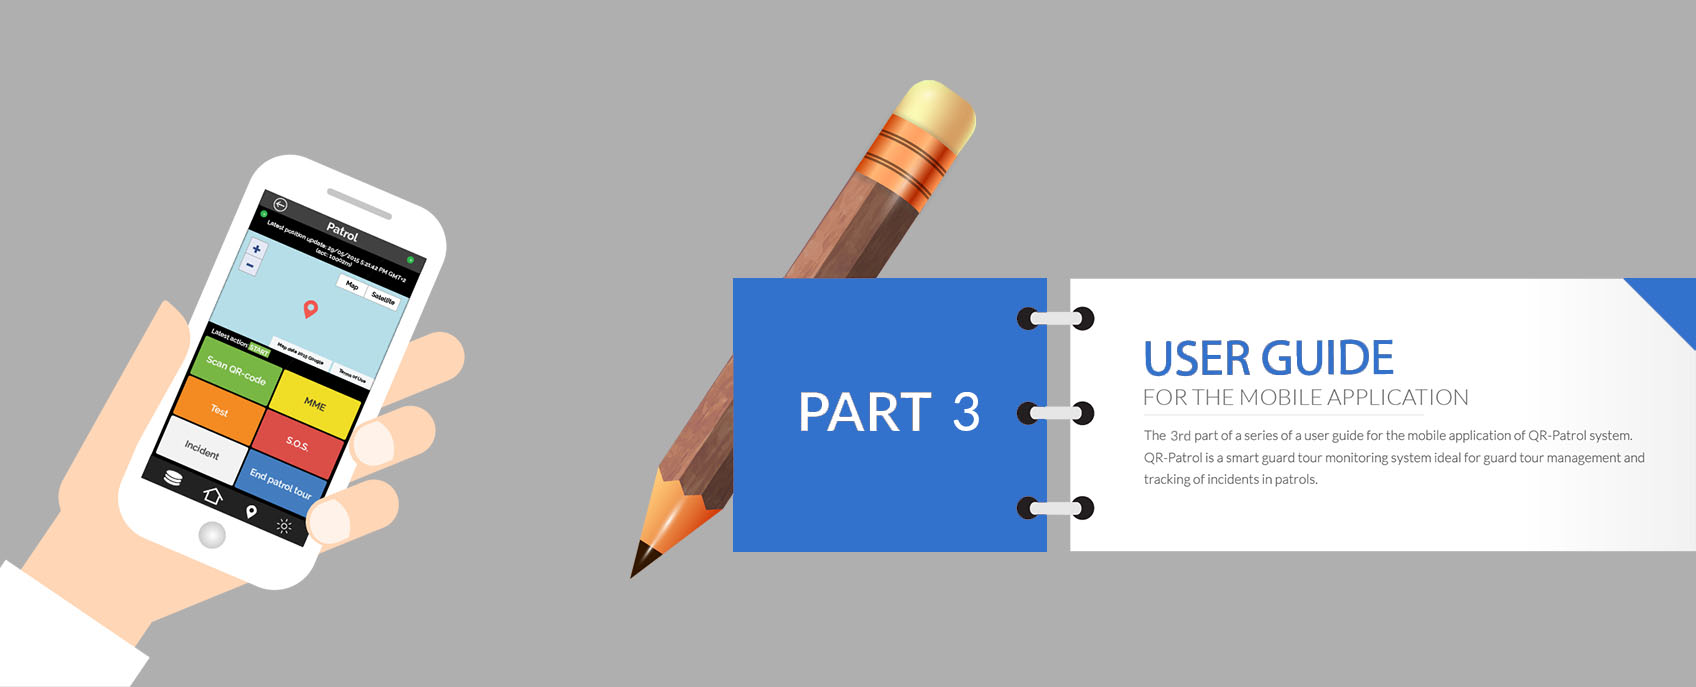
Getting into QR-Patrol mobile application - Part 3
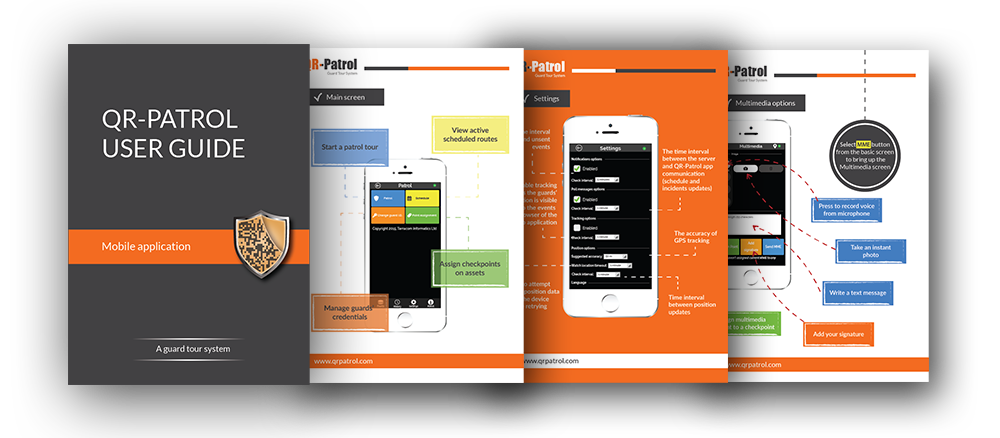
In the previous part of these tutorials, we've learned how to execute a patrol tour and all the available options a guard has in order to accompish his guard tour tasks successfully. In this tutorial, we will show some basic settings and QR-Patrol mobile application functions, such as schedules, settings and assigning checkpoints.
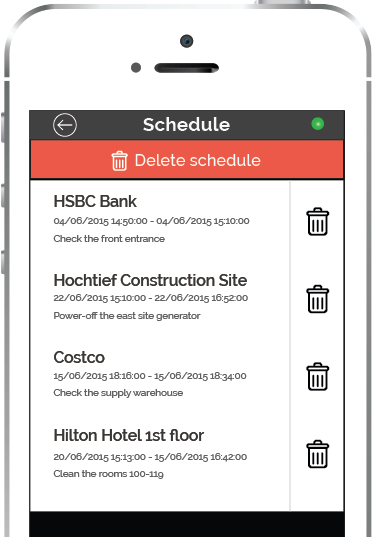
Schedule
Return on the main screen and press Schedule button. A list of the points to check appears. Each point consists of the time interval in which the scan must occur and the exact action to be taken. Schedules to be executed are created in the QR-Patrol web application. (There will be a tutorial about how to create a schedule in the advanced web application in the near future.)
The checkpoints and all the necessary actions have been assigned via the web application by the people who manage the guard tours and assign tasks to the guards.
.
Late Scan - Irrelevant Scan
If a guard scans a checkpoint later than the predefined time interval, then a pop up message appears that the scan is late and he has not managed to comply with the schedule arranged for him.

In case the guard scans a checkpoint other than the predefined checkpoints of his schedule, then a pop up message appears that he seems to be off schedule, meaning that he is not following the schedule arranged for him.
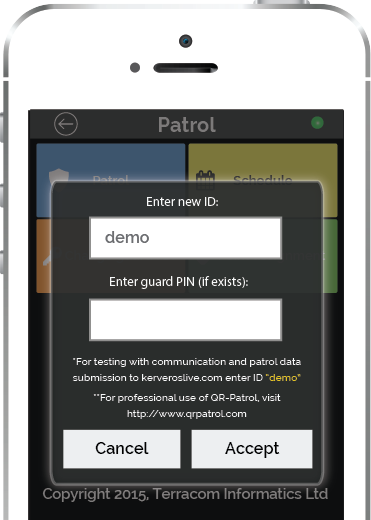
Change Guard ID
From the main screen select Change guard ID. A pop up window appears. Enter new ID and PIN and press Accept in order to change credentials.
Change guard ID is useful in the following cases:
Give the smartphone to another guard
Stop demo mode of application and use specific guard ID.
.
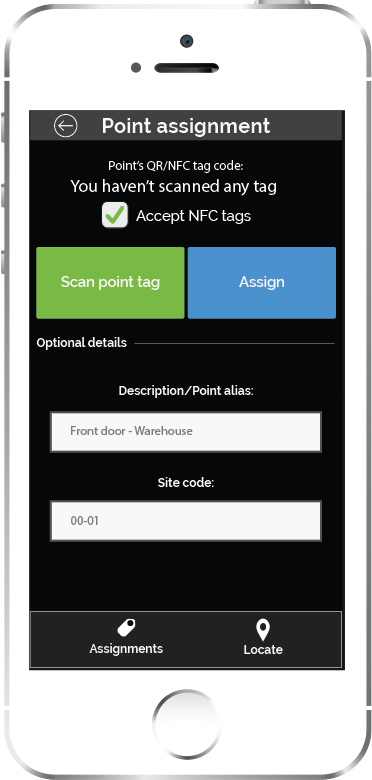
Assign checkpoints
Return on the main screen and press the Point assignment button.
For each QR-code/NFC tag add a description and assign a unique site code. (Site is the specific asset, e.g. building on which the label will be placed - ** You have to input the same site code you added on web application in the clients sites list section**).
Point assignment screen is a necessary procedure in order to assign each NFC / QR code label to a specific location.
You can get all the necessary QR-code / NFC tags either by a shop in the global market or order checkpoints from QR-Patrol shop. In case you need a large amount of checkpoints(1000+), QR-Patrol shop will provide checkpoints with your logo and website details printed on NFC/QR-code tags!
.
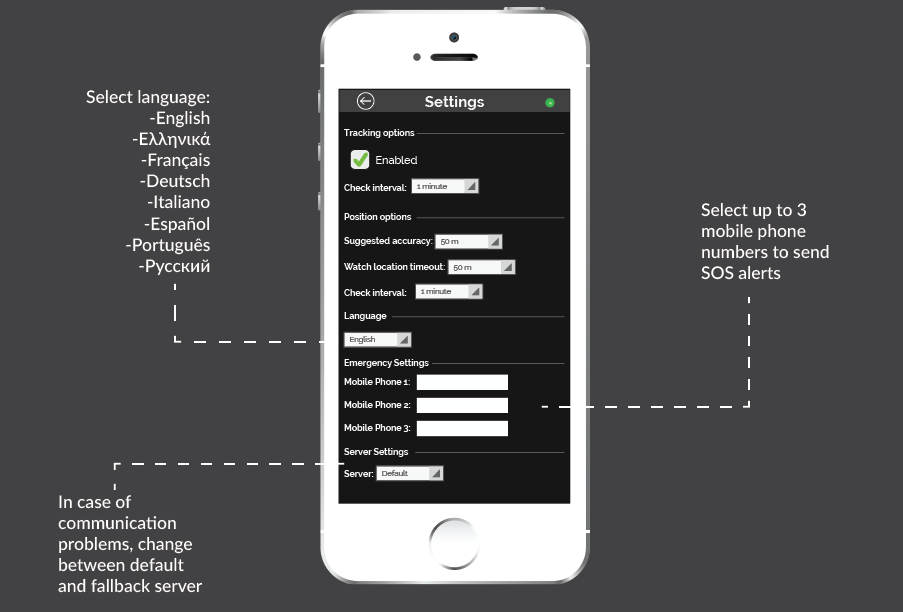
Settings
QR-Patrol offers a settings interface in order to configure basic notifications and parameters of the system and the server responses. You can press on Settings button in the initial screen and change settings such as enable tracking, time interval between updates, time to resend unsent events, etc.
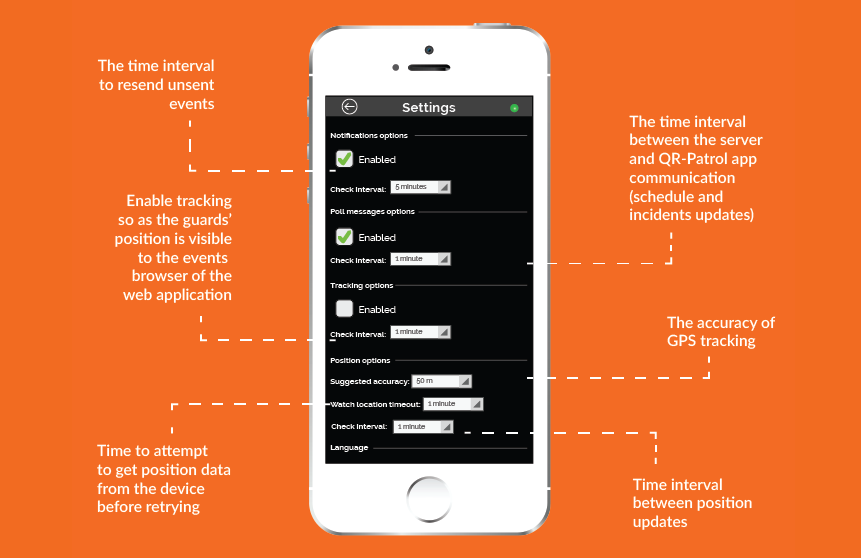
You can also select your own language , or add up to 3 mobile phones to receive SOS alerts and check all the available server options to solve communication problems.
In the next section, we will explain events, options and clarify some troubleshooting issues.
Don't forget that you can get a closer look in QR-Patrol mobile application functionality and download the full guide by clicking on the image!